Creating a Custom Lab
You can create your own labs. You can then make your labs available for others to use. This involves a three step process:
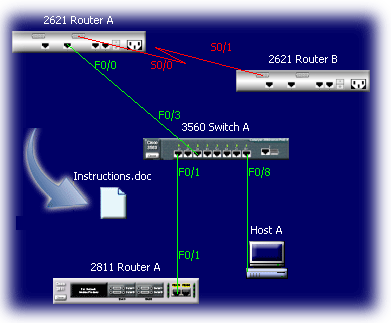
Create and configured a network
Insert instructions
Save your network into the Customer Networks folder and make it available to others
Steps
1. Open a Network Visualizer screen.
2. Place the desired devices on the screen.
3. Connect the devices.
4. Configure the devices.
5. Use a third-party program to create instructions. This can be a text editor, word processor, html editor, spread sheet program, etc. The important thing to keep in mind is that the person using labs/networks that you create must have the same program on their computer that was used to create the instructions. Save the file as you normally would do.
6. There are two ways to insert a document.
Using the menu, click Insert and then File.
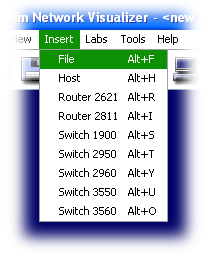
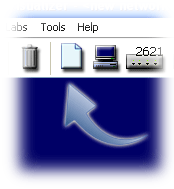
Click the Insert button on the button bar.
7. Find your instruction file on your computer and then click the Close button on the dialog box. An object will appear on the network with file name of your instruction file.
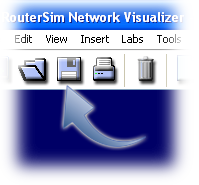
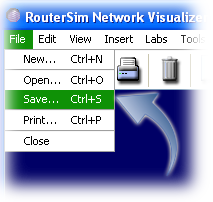
8. Save your network. There are two ways you can save a network layout. The first way is by clicking on the Diskette button on the button bar, at the top of the Network Visualizer screen. You can also click File on the menu and choose Save from the drop down menu.
 |
 |
9. You will want to save your file to the custom networks folder. It can be found off the root folder (program files\routersim\ccna6\custom networks). Any network saved to this folder will display on the Network Visualizer menu.
You can save your files alphabetically - If you save your files alphabetically, that is how they will be sorted and displayed when presented on the Custom Labs menu.
You can save your files with a numbering scheme - You can number your files which will allow you to specify the order of display, regardless of the alphabetical spelling of the file name. For example, let us say you have four network files that are being saved to the custom networks folder. You assign a number to the title of these files in this manner:
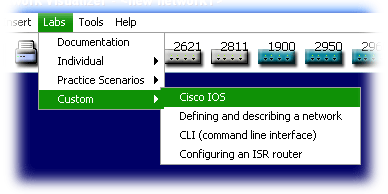
10_Cisco IOS
20_ Defining and describing a network
30_CLI (command line interface)
40_Configuring an ISR router
10. Close and re-open the Network Visualizer screen and you can now view your custom labs.
11. You can distribute your custom labs to others so that they show up on their menus.
Network
It is straightforward to distribute the files if you have a network install. Save all the custom labs to the custom networks folder on the server. When anyone launches this program from their workstation, the custom labs will display on their Labs menu.
Standalone
You can also distribute the files to others or place these files yourself on standalone systems. Copy all the custom labs to the custom networks folder.